Website Pages

Sunday, August 22, 2010

Shooting on location.

As a professional photographer without a brick & mortar studio, I do all my shooting “on location”.    Location shooting is not without it’s challenges.  A short list of factors you must be able to work with and around if necessary include, weather, sunshine, wind, environment and accessibility.  You must also consider the welfare of your model or client(s).

There are several ways to bring what is outside into the studio, but often, shooting on location will offer creative opportunities not available in the studio and will provide a memorable experience for the client.  Remind me I said that when it’s 100F in the shade at dusk and a client schedules a location photo shoot.

You can go light on equipment you carry with you and concentrate on taking advantage of the location layout, bring a production crew, or stop somewhere in between.  Most of us, myself included, stop somewhere in between.

In order to master your creativity, you must be completely comfortable with your equipment.  This doesn’t mean you need to memorize the manual, but you should be able to quickly and easily change settings on your equipment as necessary.  Being able to do this will prevent a fun photo shoot from turning into a stressful situation.  It will also help prevent you from missing “the shot”.

When shooting on location, I like to use an off camera flash mounted in a 15x15” softbox with on camera flash modified by a bounce card.  Both flash units are mounted on a pocket wizard FlexTT5 and configured in master/slave modes with A:B ratios.   This setup is excellent for outdoor portraiture and can be enhanced by using a scrim to remove harsh sun from your subject and a reflector to add light without carrying an additional flash.  The FlexTT5’s ensure that my remote slaves work without having to worry about whether their sensor is pointed at the master flash or even covered up.

Not all location shooting is done outdoors.  I often take studio lighting with me to shoot indoors at large events.  For me, the major difference in shooting indoor event photography and studio shooting is how you have to set your equipment up.  When shooting a client or model, location shooting indoors is very similar to location shooting outdoors.  When shooting an event, you may need to locate power, run extension cords, and set up a backdrop, lights, table, computer, printer, etc., depending on the nature of the event.

Saturday, August 21, 2010

A Review: Eye-Fi Pro X2 8GB + Wi-Fi

During the past year I was exposed to Eye-Fi advertising that looked worthy of further investigation. Like some many other ads I plan on looking into, this one went to end of my priority list until I was suddenly faced with a need to connect a camera wirelessly to my laptop at an event.  I learned in the two months prior, that other event photographers had successfully incorporated the Eye-Fi cards into their workflow.  Armed with that knowledge I purchased an Eye-Fi Pro X2 8GB+Wi-Fi   card from Amazon.  

The Eye-Fi Pro X2 8GB+Wi-Fi card arrived yesterday in a package about the same size as a DVD.  The box contained an almost useless paper manual (software installation instructions) and the Eye-fi card pre-inserted into a sdhc to usb adapter. 

Installation software for the Eye-Fi card came loaded on the Eye-Fi card.  Installing the software went smoothly and requires an internet connection to configure the Wi-Fi to your network.  This is one thing I would like to see change.  Any program that can be run via the internet to update the settings on the Eye-Fi card should also be able to run locally.

When the software was through configuring the Eye-Fi card for my home network, it instructed me to remove the card from the laptop, put it in the camera and take a picture.  The picture is supposed to show up in Eye-Fi Central, the software that Eye-Fi uses to let you upload photos and video quickly and easily to social networking sites. 

Here was where I encountered my first problem.  I loaded the Eye-Fi card into my 1DsmkII and took a photo…,   a RAW photo.   The images transferred to my laptop without any trouble, but that final window in the configuration software where I was supposed to be able to see my photo seemed to hang..,   of course it seemed to hang, the RAW file I took was over 17mb’s in size…  and I have a DSL connection to the internet.   When it appeared I was never going to see the image in the Eye-Fi Central, I closed it and moved on.

Next, I walked around the house with camera in hand and took a series of jpeg images. When I returned to the laptop,  all the images had transferred.  Okay, this test was successful, but I was connecting to my home networks wireless router and my goal was to connect to connect directly to my laptop in ad-hoc mode. 

Initially I though I couldn’t do it from the main network screen in Eye-Fi Central and ended up trying to configure the Eye-Fi card to look for my laptop that same way it would look for a Wi-Fi hotspot.  After going through the software settings several times and changing my laptop to ad-hoc mode, I was I able to achieve a connection.   Unfortunately after power cycling the laptop and the sdhc card, I was unable to connect again.

Ultimately, I did figure my connections out, although I didn’t know it because Zone Alarm was blocking the incoming signal from the Eye-Fi card. Once I closed Zone Alarm I was able to confirm my settings and restart Zone Alarm.  

I have re-booted the laptop several times and also moved the card from the 1DsmkII to the 1DmkIII.  Each time I turn the camera on and take a photo the image transfers to the laptop without a hitch.    A raw file from the mkIII takes 38 seconds to transfer from the time the shutter is pressed.  Jpeg’s are much quicker, with a M2 jpeg taking approximately four seconds.

The first time I ever tethered a camera to a computer I used Canons software. I also used Canons software at the first event I offered photos printed on location. In addition to that, I used Lightroom, which can be set to auto import files from a watched folder.  LR3 offers the ability to tether a camera now, but with the Eye-Fi available, you can skip the tether and transfer your images.

According to Eye-Fi, only the Pro version is capable of ad-hoc connections and transferring RAW files. You can compare the X2 models here.

Sunday, July 11, 2010

Next Get together

Looking at the 24th for a meet up, coffee, or whatever on the Riverwalk early in the morning before it gets too hot. Meet at either the Starbucks in River Center Mall, or in front of the Alamo, and then head down onto the River. I am going to make it a one lens day for me, probably the D700 and 50mm lens. How about 0800 hours. I will post on TPF as well.

Murph

Saturday, June 19, 2010

Codecs, What are they and why do we need them?

The word “codec” refers to compression/decompression program or device used for video, music and images.  When they are available on your computer system and working properly, using them is transparent to the end user.  Unfortunately, codecs for all uses are not always included with special use programs (such as photoshop) or operating systems (windows XX or X versions, 32 and 64-bit).    Most video editing programs come with their own proprietary codecs, but do not include codecs for all video formats.

From a photography perspective, this results in not be able to see thumbnails of raw images forcing you to open a proprietary program in order to see thumbnails of raw files.   If this fits into your workflow, then you may not need nor desire the ability to see raw image thumbnails in Windows explore, view raw files in windows file viewer or view raw files in windows media center.

Some photo editing tasks benefit from the ability to view raw thumbnails. For example, Photomatix Pro will open a dialogue box asking you what you want to do with a set of images when you drag them from windows explorer and drop them in the Photomatix window.  You can also drag from Adobe Bridge which also lets you view thumbnails of raw images. If you always work from Bridge, perhaps you don’t need a better solution. If you like to see your files, no matter what window you are in, there is an easy way to do so.

Axel Rietschin Software Developments  has produced a codec pack  that allows you to see thumbnails for CR2, CRW, NEF, NRW, PEF, ORF and Adobe DNG files in 64-bit and 32-bit versions of Windows 7, Windows Vista and Windows XP SP3.  The company also produces FastPictureViewer Professional which includes their codec pack and provides a way to quickly scan through your images and determine which ones you will keep.  Their website has a number of video tutorials on how to effectively use FastPictureViewer Professional and they offer 32-bit and 64-bit free trial downloads of their program. 

FastPictureViewer Professional also offers tethered shooting capability.  Video tutorials are available on their website.

Sunday, June 13, 2010

Get together

Officially it is now on the 26th, and we meet at the Japanese Gardens at 0830. See you all there!

Phones

Ok, now that I have entered the 21st Century with a Blackberry 9700 (blueberry 9700 to the girls), I can now start looking at what is out there photographically. Thanks to Ken for steering me in this direction. She Who Must Be Obeyed got an iPhone 3Gs and is happy with it (as are the kids).

Thursday, June 10, 2010

i7-920 now lives here!

The release of Lightroom 3 turned out to be  good timing.  I was assembling an i-7 920 processor based system to provide support for CS5 and now I get to migrate Lightroom 2.7 to  Lightroom 3 at the same time.  I have already installed the trial versions for both programs and will license them both before the 30 day trial period ends. Already loaded EDD Pro, thanks to Sergio and Jerry previously learning that a 64-bit Sentinel driver is available for the usb dongle (anti-piracy).

I still need to load Lumapix Fotofusion, Photomatix, neat image, Qimage, Epson 7900 drivers, Intuous 3 Wacom tablet drivers and take a look at the mogrify plug-in (for Lightroom) by Timothy Armes, but with the changes and additions that have been made to Lightroom  3, it’s highly unlikely that I will need to “mogrify” my files when converting to jpeg.

I'm having to reconfigure my KVM a bit. I need another DVI to VGA adaptor for the old system so I can run both the old and the new as switch between them as necessary.  I also discovered that either I have a faulty ps/2 to usb adaptor or the motherboard is sensitive to such things.

One item I overlooked is whether or not there is a 64-bit driver available for my color calibration equipment.  I’m hoping it is, as I’d prefer not to be in the market for  new color calibration software and equipment.
I’ll share more, including pics as I have the time to direct my attention along those lines.

Sunday, June 6, 2010

Let's think about a Get together

So, how about the 26th of June, and go either to do a Missions trip, Guadalupe State Park, or something similar, so we can meet some of the new folks who have been joining TPF in the San Antonio area? It needs to be somewhat early due to the heat at mid day, but photos and lunch sounds good.

Thursday, June 3, 2010

onONe compatibility updates for CS5 are now available.

Earlier today one of the RSS feeds I receive provided notice that the CS5 compatibility updates are available. You can learn more about these updates by clicking on this link the onOne software blog by Mike Wong. 

As a registered user, I received an email direct from onOne software on June 1st, 2010 telling me the same thing and providing a direct link to the updates. 

To Build or not to Build; that has been the question.

Back sometime in 2004, I assembled a killer system using an AMD Athlon 4000+ 64 bit processor. It started life with 1 gigabyte of dual channel ram. Not much by today’s standards, but at the time AMD memory management was not the best and ram was a good bit more expensive.  I used two 36 gb WD raptors in a striped array to load the windows XP on. The system booted amazingly fast, but developed stability issues. It seems that raiding raptors on the ASUS A8V deluxe motherboard turned out to not be such a good idea.  To stabilize the board I moved the drives to a different onboard raid controller and set them up as one drive.  All went well at first, however slowly but surely Photoshop upgrades (PS7 to CS2 to CS4) started making what was once a fast enjoyable system to use, behave like it needed to be put out to pasture.
 
In the quest to stave off obsolescence I added 2gb more of ram to the system (2x1gb).  This presented a new challenge as the installed ram and the new ram had different ram timings. After a bunch of memory timing changes in the bios(trial and error), I was able to get the system to run with 3gb of ram in it.  Nice. Very nice!    But alas, the system ran that way for a bit over a year, then the additional 2gb of ram decided it could not longer be pressed to perform at the memory timings I had set for it.   So the system is back down to 1gb of ram and I see the effects every time I launch CS4, Bridge and Lightroom.  I also upgraded the video card to obtain openGL support.  Without openGL support I could not take advantage of some of the new features in Photoshop CS4, including the content aware scaling.

During this time, processors, motherboards and ram have advanced to dual core, quad core and now six core processors, while 64-bit operating systems have been polished (win sp 64-bit to Vista 64-bit to Win 7 64-bit) and motherboard manufacturers, along with ram manufacturers have helped all of it work well together with better design and engineering.

The declining performance of my current system coupled with the large performance gains to be had using newer components has finally pushed me over the edge and forced me to build a new system once again.
So where do you start to build a system that will last (performance wise) and not be crushed by the continued advance of software technology?

I chose to build a system based on the Intel i7 920 quad core processor.  This processor has a lot of room for over-clocking giving it a built-in edge against obsolescence to begin with.  The motherboard also supports faster i7 processors, so over clocking is not the only way to increase performance.  In addition Intel has recently released a 6-core processor that is supposed to be compatible with this motherboards chipset. However, at a projected retail price of more than $1000 dollars, I’ll be waiting quite a while for prices to drop…

To support the i7 920 processor I selected the ASUS P6T Deluxe version 2 motherboard. 
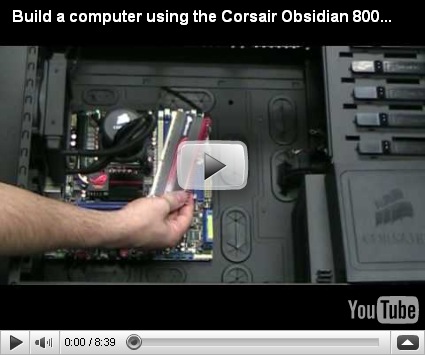
This you-tube video provided all the information necessary to persuade me.


Computer cases cover a wide range of prices, from the barely gets it done cookie cutter, almost cut your fingers off while building type, to the top end, well thought out, wish there were all designed with this much though type.
I chose to go with the latter.  Here is part 1 of a video showing the Corsair 800D case being used for a system build.


Part 2 for those of you that are interested.


Okay. We have the case, motherboard and processor identified. How much ram should I feed it?  Well, I’ve had issues before with building systems that wouldn’t handle all the ram the specs said without causing stability issues or failing to boot, but this time I think the industry finally “gets it” and has designed everything to work as expected.  I settled on G. SKILL Ripjaws Series 24GB (6 x 4GB) 240-Pin DDR3 SDRAM DDR3 1600 (PC3 12800). Yes, that’s 24gb of ram.   As long as the motherboard doesn’t balk at running the full 24gb matched set of 4gb sticks, I’ll keep it set up that way.

Okay, so why 24 gb of ram? Why not 12gb or 6gb?  The answer to this question lays in the intended use of the system. This is primarily going to be a Photoshop computer.   Here is what Adobe has to say about ram usage on a Windows 7 64-bit system.  For you Mac users out there, here is what Adobe has to say about optimizing performance for Photoshop CS5 and CS4.
So that settles that, for a 64-bit OS running 64-bit Photoshop, Photoshop will use “as much ram as you can fit into your computer.”

Next on the list of parts is the video card. Adobe's "List of tested graphics display cards for Photoshop CS4" includes the  n Vidia 260 GTX 896MB.  I went with the EVGA 260 GTX 896MB which utilizes the nVidia chipset.  The motherboard I’ve selected for this build will support three of these video cards, but since this system is for Photoshop and not for gaming, additional video cards will have to wait.

When you build a system for speed, it only makes sense to use the faster hard drives available for the OS and programs.  I chose to use the WD VelociRaptor WD6000HLHX with a 6gb/sec transfer rate and 32gb cache.  It is not the fastest hard drive available, but it has an acceptable price for the performance offered.  Of the VelociRaptor series, only the WD6000HLHX and the WD4500HLHX offer 6gb/sec transfer rates.

 Here is the information on Western Digitals new SATA Solid State Drives.  Interestingly enough, while there is a lot to like about a solid state drive, the performance specs say the interface burst speed is rated at 3 gb/sec, with a sustained read speed of “up to” 250 MB/sec.  If you can only read data at 250 MB/sec, how do you transfer it at 3gb/sec? This data point is not provided in the specs for the 600gb VelociRaptor, so I have nothing to compare with.  Interested in the cost per gigabyte for Western Digital's 256gb offering? Want to compare that to the cost per gigabyte for the 600 gb VelociRaptor.   Current pricing puts the 256 gb SSD cost per gigabyte at $2.54 and the cost per gigabyte of the 600 gb VelociRaptor at .47 cents per gigabyte.

Data storage is something a photographer is always thinking about. To that end I’ll be installing a Western Digital Caviar Green WD20EARS 2TB drive. This gem sports a 3 gb/sec max transfer rate and uses less energy than the 600gb VelociRaptor, although not significantly enough, in my opinion, to warrant calling “Green” until you compare it to a WD Black Caviar drive.  Currently .07 cents per gigabyte.

Whoa! Stop the presses!  The next drive to take a look at is the Western Digital WD2001FASS, a 2 TB, SATA 3 Gb/sec, 64 MB Cache, 7200 RPM drive.  A quick look at the specs shows that not only is the WD20EARS Green, it is very GREEN.  The WD2001FASS  is rated for read/write at 10.7 watts and idle for 8.2 watts compared to the Green drives 6 watts for read/write and 3.7 watts while idle. The more amazing part of all of this is the 600GB VelociRaptors read/write rating of 6.2 watts and idle rating of 4.3 watts.

As long as we are thinking about reducing the cost of the operating system, lets take a look at paying a little more for a drive and getting performance and power out of it.  Western Digital has a line of Enterprise SATA Hard Drives. For comparisons sake, we'll only look at the WD RE4-GP, a 2TB green enterprise drive. This drive is rated at 6.8 watts for read/write and 3.7 watts when idle making it a clear winner over the WD2001FASS 2TB drive. Newegg lists is drive for $279.99 which comes in at 14 cents per GB vs. $229.00 for the 2TB Black Caviar drive (which is power hungry) which is currently at 11.5 cents per gigabyte.  Pay a little more up front and pay less to operate the system.

I think the WD RE4-GP 2TB drives may be optimum for use in a backup device such as the Drobo, but may be more than I need for data storage in my system build.  I hope to know more once I see how the WD20EARS performs. Reviews of the previous version (WD20EADS) indicated it ran hot.

Well, all these components need a power supply that can not only do the job, but ensure that I have power to spare for additional drives, fans and perhaps another video card. I selected a CORSAIR HX Series CMPSU-850HX 850W ATX12V 2.3 / EPS12V 2.91 80 PLUS SILVER Certified Modular Active PFC Power Supply  This unit should be able to handle my components power needs quite handily.

I’m looking forward to assembling this system and will post additional information once I have it up and running.

Sunday, May 30, 2010

Welcome!

Welcome to The San Antonio Photographer's Network. I've started this blog to give myself and friends a place to post information, photoworthy event dates(see the calendar),  photos, technical support questions and answers, etc., somewhere besides our business websites.   I hope you find something here that benefits your photography. 

If you've stumbled across this blog and are interested in participating, send me an email stating the same.  Adding additional authors to this blog will not be automatic, but will be considered.

Thanks,
Ken Lane